How to Test a Fish Feed Extruder After Cleaning: Static, No-Load and Load Checks
Leave a message
Why a Test Run After Cleaning Is Not Optional
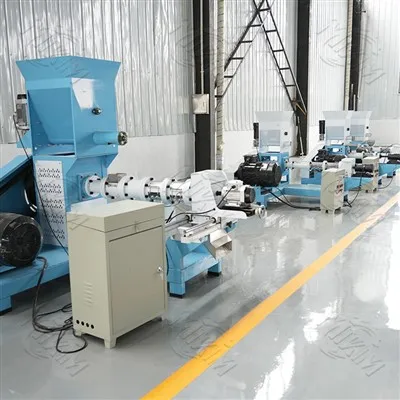
After cleaning a floating fish feed pellet making machine, a test run is not optional. Reassembly mistakes, residue left inside the barrel, a misaligned ring die or a loosened electrical connection may all be invisible from the outside, yet they appear immediately as vibration, noise or broken pellets under load. A structured three-step test, covering static inspection, no-load running and a small-batch load test, catches these problems while the machine can still be stopped easily and corrected, protecting both the equipment and the quality of the first production batch.
Step 1: Static Inspection Before Power-On
Before switching on the power, reinstall every disassembled part in its original position and tighten the fasteners: the machine cavity cover, the ring die and the cutter. Rotate each moving component by hand, including the feed screw, the cutter and the ring die, and confirm that rotation is smooth, with no jamming and no abnormal noise. Then check that the power cords were not loosened during cleaning, that the plugs sit firmly in their sockets, and that the contacts are clean and tight. This inspection takes only a few minutes and prevents most electrical and mechanical faults from ever reaching the running stage.
Step 2: The 30-Second No-Load Test
Switch on the power without feeding any material and let the machine run idle for about 30 seconds. Listen for a uniform operating sound with no clunking, and watch the cutter and the ring die: the cutter should rotate smoothly and the ring die should not wobble. If abnormal noise appears during idle running, disconnect the power immediately and check whether parts are misaligned, for example whether the ring die is seated on its locating pin or whether a screw was left loose. Running a machine with a mechanical fault even briefly can bend the die or damage the drive, so stop at the first sign of trouble.
Step 3: Load Test with a Small Batch
When the no-load run is clean, add a small amount of raw material to the feed inlet, a little at a time, and watch the pellet output. If the pellets are uniform in size, smooth on the surface and free of broken particles, the cleaning and reassembly are complete. If output is intermittent, some die holes are probably still blocked; stop the machine, inspect the ring die again and clear the unopened holes before continuing. Intermittent output usually means partial blockage rather than a mechanical fault, but it must be corrected before full production begins.
| Test stage | Duration | What to watch |
|---|---|---|
| Static inspection | A few minutes | Seating, fasteners, free manual rotation, wiring |
| No-load running | About 30 seconds | Uniform sound, no wobble, no clunking |
| Small-batch load | Until output steadies | Uniform size, smooth surface, no broken pellets |
Common Faults Found During the Test
Clunking at idle: the ring die is not seated on its locating pin, or a fastener was left loose.
Wobbling cutter: the cutter was fitted on the wrong shoulder or the retaining bolt is not tight.
Intermittent pellets: partially blocked die holes or uneven feeding at the inlet.
Vibration that grows with temperature: the drive or the feed screw is out of alignment.
Finely crumbled pellets: moisture or conditioning temperature is the cause rather than a mechanical fault.
Final Checks Before Normal Production
After a successful test run, let the machine run for about five minutes before feeding it for normal production. This warm-up period lets the barrel, the screw and the die reach stable temperature and lets the drive and feeding systems settle, which lowers the probability of another shutdown shortly after start-up. Use those minutes to confirm that pellet appearance stays consistent and that no unusual vibration develops as the machine warms, and keep the first batch small until output is stable.
Keeping a Post-Cleaning Test Record
Record the three stages, the readings taken and any fault found, together with the die and cutter that were reinstalled. Over several cleaning cycles the record shows which parts wear fastest and which faults repeat, which turns a routine test into a maintenance planning tool rather than a formality.
FAQ
Q: Why not skip the no-load test after cleaning?
Because most reassembly faults show up within seconds of start-up. Running the machine idle for 30 seconds reveals misalignment, a loose fastener or a wobbling cutter before any material is committed to the barrel.
Q: What does intermittent pellet output mean?
It usually points to partially blocked die holes rather than a mechanical fault. Stop the machine, inspect the ring die, clear the unopened holes and restart with a small batch.
Q: How long should the warm-up run last before full production?
About five minutes. That is enough for the barrel, screw and die to reach stable temperature and for the drive and feeding systems to settle, which reduces the chance of a second shutdown.
Q: Which parts must be checked by hand before power-on?
The feed screw, the cutter and the ring die. Each should rotate smoothly with no jamming and no abnormal noise, and the cavity cover must be refitted and tightened.
Q: Can a loose electrical connection be spotted without testing?
Only by inspection. Check that cords were not loosened during cleaning and that plugs sit firmly with clean, tight contacts, because a poor connection appears as noise or vibration under load.
Q: What should be done if vibration increases as the machine warms up?
Stop and recheck alignment of the drive and the feed screw. Vibration that grows with temperature is a mechanical signal, not a material problem, and continuing production risks damage to the die.