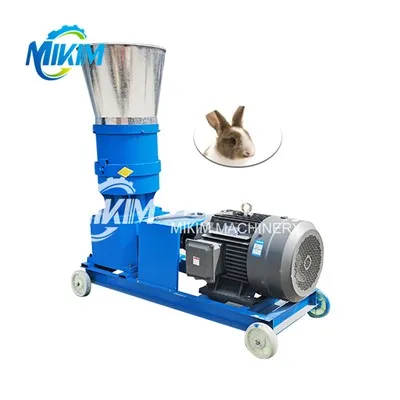
Grinding Disc Replacement in Chicken Feed Pellet Machine: Step-by-Step Technical Guide
Leave a message
The grinding disc (also called die plate or pelletizing die) is one of the most important wear parts in a livestock pellet machine. Its condition directly affects pellet quality, production capacity, and energy consumption. Incorrect replacement can lead to poor pellet formation, machine vibration, or even serious damage.
This guide explains practical, factory-proven steps to replace the grinding disc safely and correctly, based on real maintenance experience from feed production lines.
1. When Should You Replace the Grinding Disc?
Before replacing, confirm whether the disc is truly worn. Common signs include:
- Pellets become irregular or cracked
- Output capacity drops significantly
- Material leakage from die holes
- Increased motor load or abnormal vibration
- Visible wear, deformation, or blocked holes
👉 In real production, a worn die can reduce efficiency by 15–40%, so timely replacement is critical.
2. Safety Preparation Before Replacement
Proper preparation avoids damage and injury.
Required steps:
Turn off power and lock the main switch
Wait until the machine fully stops rotating
Wear protective gloves and safety goggles
Prepare tools: wrench set, cleaning brush, lubricant, soft hammer
👉 Never attempt replacement while the machine is hot or running.
3. Step 1: Remove the Feed Hopper and Cover
Start by opening access to the grinding system:
Remove the feeding hopper
Open the protective cover of the pelletizing chamber
Clean visible dust and leftover material
👉 This step ensures you can clearly inspect internal components before disassembly.
4. Step 2: Loosen the Pressure Roller Assembly
The grinding disc works closely with rollers, so they must be released first:
- Loosen roller adjustment bolts
- Move rollers away from the die surface
- Check roller wear condition (replace if uneven or cracked)
👉 Incorrect roller positioning is one of the most common causes of poor pellet quality after installation.
5. Step 3: Remove the Old Grinding Disc
Now carefully remove the die plate:
- Unscrew fastening bolts evenly (do not force one side first)
- Support the disc weight to avoid dropping
- Gently remove the die from the main shaft
- Clean the mounting surface thoroughly
👉 If the disc is stuck, apply light tapping with a rubber hammer instead of metal tools to avoid damage.
6. Step 4: Inspect the Shaft and Chamber
Before installing a new disc:
- Check main shaft surface for wear or deformation
- Clean all residue and grease
- Ensure no metal particles remain inside chamber
- Apply a thin layer of anti-rust lubricant if required
👉 This step ensures stable installation and longer die life.
7. Step 5: Install the New Grinding Disc
Now install the new die:
- Align die holes with shaft positioning keys
- Place the disc carefully into position
- Tighten bolts gradually in a cross pattern
- Ensure even pressure across all points
👉 Uneven tightening can cause vibration and premature wear.
8. Step 6: Adjust Roller Gap and Alignment
After installation:
- Reset roller pressure according to material type
- Ensure uniform gap between roller and die surface
- Rotate manually to check smooth movement
- Confirm no friction or abnormal noise
👉 Proper adjustment directly affects pellet hardness and output efficiency.
9. Step 7: Test Run and Calibration
Start the poultry pellet machine for a controlled test:
- Run empty for 2–3 minutes
- Gradually add raw materials
- Observe pellet shape and discharge stability
- Check motor load and vibration level
👉 If pellets are too soft or broken, adjust roller pressure or moisture level of raw material.
10. Maintenance Tips to Extend Grinding Disc Life
To reduce replacement frequency:
- Avoid over-hard raw materials (stones, metal fragments)
- Maintain proper moisture level (12–18% for most feeds)
- Clean die holes regularly after production
- Do not run machine at overload capacity for long periods
👉 A well-maintained die can last 30–60% longer in real factory use.
11. Common Mistakes to Avoid
Installing die without cleaning shaft surface
- Uneven bolt tightening
- Ignoring roller wear during replacement
- Starting machine without test run
- Using incompatible raw materials
👉 These mistakes often lead to early failure of new grinding discs.
Conclusion
Replacing the grinding disc of a chicken feed pellet machine is not just a mechanical task-it is a precision maintenance process that directly affects production stability and feed quality.
Correct installation ensures:
- Stable pellet shape
- Higher production efficiency
- Longer machine service life
- Lower maintenance cost
Company Introduction